PROJECT LIFE – WEEK 43

Project Life WK 34 - 1

I hope you all had a great Thanksgiving weekend!

Two weeks ago, I posted about how I was going to tackle finishing up my 2017 project life album. I had every intention to keep up with this project throughout the year, but it quickly fell to the waste side. I always felt extremely overwhelmed with a bunch of ideas and never got them out of my head. That’s why I set up a couple of simple guidelines to follow and I gave myself 30 minutes to complete my weekly spread. It was nice to finally spend time playing with my supplies. An I was very surprised with how quickly it came together.

Here’s a look at week 43:

PL WK 34 - 2

This week was full of fresh starts. It was the week leading up to the blog launch and I was focused on getting all of the last minute planning done.  I highlighted this by placing a picture of my calendar and a 3×4 project life card with my motto.  Looking forward to seeing how this week will looks like next year. 🙂

I got a couple of questions about the weather stamp during my last post and it’s from a old Studio Calico kit. Which at the time I am writing this, is still available on their shop.

I tried to create cohesion across the spread by placing the wash tape included in the kit on all of the photos. I also added the corkboard circles on a couple of the cards and I’m very happy with how it turned out. Again, it was about keeping it simple and getting it done. Could I have spent more time adding more stuff? Absolutely. But that wasn’t my goal and in the end, it’s good enough for me.

PL WK 34 - 3

I look forward to sharing more completed weekly spreads in the next month. I will also share what my plans are for this project in 2018.

Continue Reading

PUMPKIN FLAN

Pumpkin Flan

Sweater weather officially arrived in South Florida a couple of weeks ago and left very quickly. Typical. But with Thanksgiving just a couple of days away, I wanted to share one my favorite fall desserts – my mom’s pumpkin flan! She also makes a coconut one; which is to die for, but there’s something special about this one. Especially during this time of year!

Baking, so much more than cooking is an exact science. But that doesn’t stop mom from explaining her recipes by telling you to add a “pinch of this” and “a little bit of that”. This drives me nuts! That’s why I’ve never asked her to show me how to make it. I know that if I try, I won’t get it right. But she agreed to write down the recipe, so here it is!!!

Pumpkin Flan

For the caramel:

  • 1 cup of sugar

For the flan:

  • 1 (15oz) can of pumpkin puree
  • 1 (14oz) can of Condensed milk
  • 1 (12oz) can of Evaporated milk
  • 1 cup of whole milk
  • 4 eggs
  • 1/4 tsp salt
  • 1 tsp vanilla

Preheat your oven to 350° F and set some water in a pot to boil.

The first and most important thing you have to make is the caramel. This is a crucial part of the desert, but it shouldn’t intimidate you. It’s very simple to make, even for a beginner. Just make sure to keep an eye on the sugar since it can burn very easily. Trust me, I got distracted while making it and we had to make it twice. Oops.

If done right, you will have a beautiful coat covering your flan. Which is sure to impress your family and friends.

In a saucepan, add the sugar and set over medium heat.  Begin to stir as soon as the sugar starts to melt. Once its reaches a honey or medium amber color, remove from the heat and pour in a baking dish or soufflé ramekin.

Pumpkin Flan

Swirl the caramel around, making sure to cover all of the edges.

In a blender, add the eggs, milk, vanilla, and salt and blend on medium speed. You can also use a whisk or an electric mixer.

Pumpkin Flan

Pour the mixture over the caramel.

Place the backing dish in a larger pan and pour the hot water round it, making sure that it reaches at least half way up the dish. The water bath (or baño de Maria) will unsure that the flan cooks at an even temperature, allowing the custard to set.

Bake for 45 to 50 minutes. You can check to see if it is done by sticking a clean knife in the center.

Remove from the oven and let cool. Then, put it in the refrigerator for at least 1 hour (preferably overnight) to chill.  Once you are ready to serve, run a knife along the edge. Place your serving plate over the baking dish and invert it. The flan will slide right out.

Pumpkin Flan

Enjoy!

PS: If you try this recipe, please comment below and tell me what you think. 


Continue Reading

GETTING STARTED WITH PROJECT LIFE

Getting Started With Project Life

I started scrapbooking when I was in high school. At first, it was just a bunch of pictures and stickers randomly placed on a 12×12 page, but it soon evolved into a full blown obsession. One of the earliest albums I remember making was for my high school boyfriend. I wish I had a picture to you show you guys, it was really cute.

Over the years, I have tried multiple scrapbooking systems – including traditional layout, mini albums, travelers’ notebooks, and Project Life. Some of you may know about this last style of scrapbooking and may have a couple of albums already done. But if not, Project Life is a memory keeping system which was developed by Becky Higgins and it is meant to simplify the process of documenting your everyday life.

I know, genius!

Except that I have tried to start a project life album multiple times over the years, but have failed miserably. I think it’s because I tend to overcomplicate things and have been known to sacrifice progress for perfection. I know; I’m working on it!

This time, my goal is to keep it simple and get the stories down on paper, just like the project is intended to be. It doesn’t have to be perfect. It doesn’t have to be complicated. It just has to work for me and my schedule.

Simplicity is key.

Last week I looked through all of my tools and supplies and pulled out the ones I use most regularly when doing paper crafts. I’ve also collected a ton of project life cards over the years and plan to dig in to my stash.

Here is my list:

  1. Paper Trimmer – I got this Fiskars paper trimmer a long time ago at Michaels, but you can find them anywhere. I like it because it has a size guide, making it really easy to cut pictures.
  2. Canon Selphy CP900 – This photo printer is amazing! It is super simple to use and I can print the photos straight from my phone. Mine is a bit old, but still works great.
  3. iPhone – I plan on taking all of my photos with my phone. I have a nicer camera, but it’s too bulky to carry around with me. Again, trying to simplify the process.
  4. Stamps and Ink – The date stamp is from my local office supply store and it was very inexpensive. I know Becky Higgins has one which I’ve seen at my local Michaels, but this one works great for me. The other stamp came with a past Studio Calico kit. I really like it because it’s small and it will allow me to document a simple thing like the weather.
  5. Tools – My Tim Holtz tiny attacher is a must. I hate glue and the small staples allow me to get embellishment on a page without making a mess (trust me, I’m very messy). The corner rounder is also a fun tool to have. I may not always use it, but I have it just in case.
  6. Pens – I am extremely picky when it comes to pens. I recently found this Sharpie at the drug store and the fine tip is great for journaling. Micron pens are also really good and will not bleed-through your paper.

And that’s it! Again, I am keeping it simple!

I worked on a couple of weekly spreads this past weekend and will share them later this week.

Hope you like it!

Continue Reading

IT STARTED WITH A BOOK.

A couple of years ago I watched the trailer for an upcoming movie called Everest. I thought it looked really interesting so I did what most people do, I googled it. After watching all of the various trailers on YouTube and a couple of interviews with the director and cast, I wanted to know more. The movie was said to be based on a true story so I typed “Everest 1996” in my search engine and this was one of the first article I read.

I spent the next couple of hours reading different news article explaining what happened and found that eight people lost their lives that night. Making it one the worst disaster in the mountain’s history.

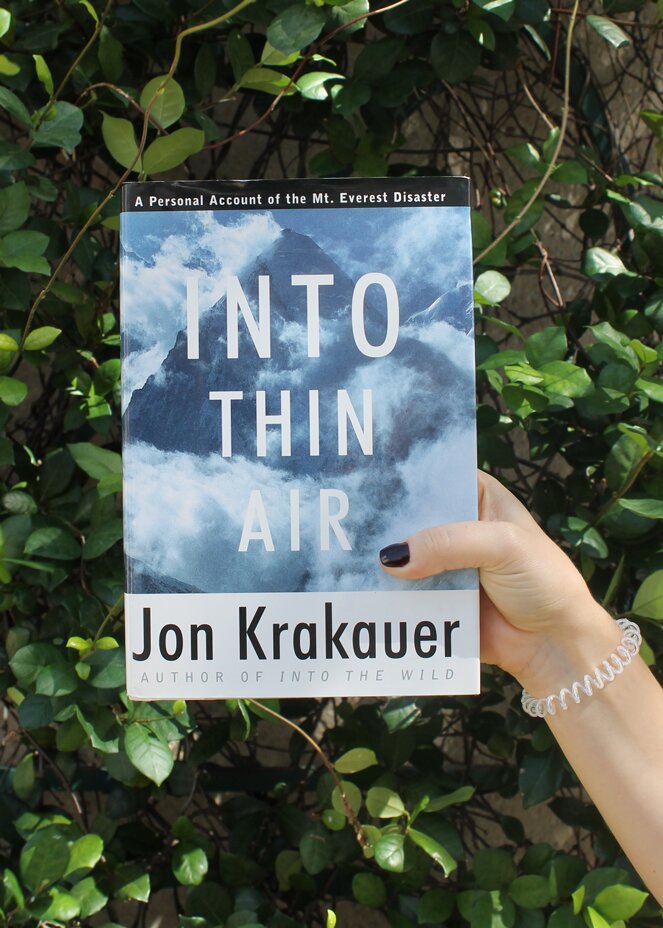
In 1996 commercialized expeditions to Nepal were becoming very popular. Outside Magazine sent one of their reporters with an expedition to write about his experience. After the disaster, he wrote a book telling his side of the story. As soon as I read this, I knew that I had to read it! That same night, I went on Amazon and placed the order. In a couple of days, thanks to prime shipping it was at my doorstep and I dove right in.

The truth is that I didn’t know that reading this book would have such an affect on me. Reading it made me feel inspired, courageous, curious and also angry. It made me feel like I was there. Walking along side these hikers while they told their stories. Standing right next to them as they were stock near the summit, trying to make their way back down. In a way this was really bizarre because I have zero mountaineering experience and the thought of doing something like this had never, ever crossed my mind.

It took me just a couple of days to finish the book. I couldn’t put it down! And as I kept reading, I kept researching.

I wanted to know everything there was about doing an expedition to Everest. What kind of training was required? The gear and equipment that would be needed to make it up the mountain? How long it took for trekkers to get to base camp? How much it would cost? Oh man, there were so many questions! But one in particular that always kept coming up, was why… Why would anyone want to do this?

Mount Everest is the tallest mountain in the world, sitting at 29,029 feet above sea lever. Lets put this in perspective. I live in South Florida. We are about 13-16 feet up, not very high. Twenty. Nine. Thousand. Feet. That’s just a bit lower than the cruising altitude of a commercial airliner. CRAZY!

I also learned about the Sherpas. The brave men and women who help guide locals and foreigners on their attempt to summit the mountain. I found that for some, being a guide is their only source of income. And when a disaster occurs, they leave behind their loved ones with very little money or support.

I wasn’t sure if I should make this my first blog post. I knew that it would be long and that I would ramble in some spots. I knew that the first couple of people to read it would be family and friends. All of which have heard me talk about this nonstop for the past two years (sorry guys!). But I had to! This book and these stores inspired me. They inspired me to learn, to explore, to care and to be passionate about something.

It’s because of this, and because of them that I started this blog. I’ve said this many times over the past two years, but I am going to say it again. This time, I’m putting it in writing and out in the universe! It is my mission to go to Nepal! I plan to trek to Everest Base camp. I want to go to as may towns a long the way and meet the incredible men and women that help others make it to the top of the world.

I want to make a difference! I want to help! All before 2020, I hope!

I hope this post inspires you and that you keep coming back. I will continue to document my journey and would love to bring you along with me.

I am happy to say that I have found my passion and will now begin to craft my quest!


Disclaimer: Please know that I am not a mountaineer. In fact, I have little to no experience in this topic. The only hikes I’ve ever done have been day trips with family and friends. All of the trails were paved and were beginner friendly. The opinions stated here are my own, and are not associated with Outside Magazine, Jon Krakauer or anyone else mentioned. This is just a story that changed my life.

Continue Reading